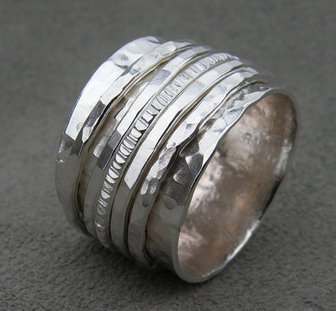
The Worry Ring: Option 1 "The Flair"
|
Steps and Tips:
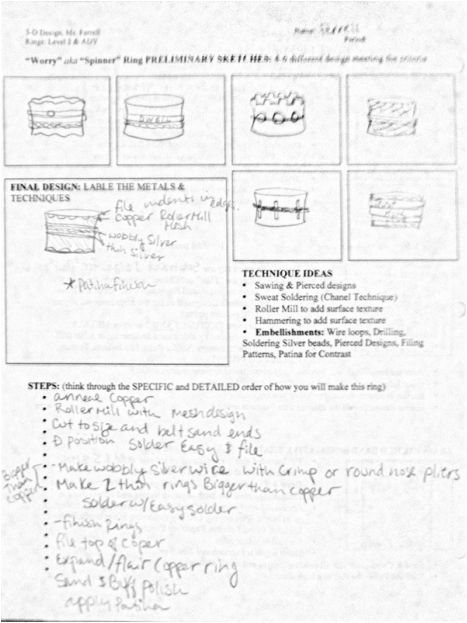
Step 1: Decide how wide the base metal will be and how you want to add texture/pattern. * For ROLLER MILL: anneal your metal, bring the texture and metal to Ms. Ferrell for assistance on the roller mill. * For FORGING: anneal your metal, create the ring 1 1/2 to two sizes too big, so that you have room to expand it through planishing/forging. Step 2: Size your ring with the paper slip, mark with a sharpie, snip off excess, and belt sand until even and accurate size. (see tips from Step 1 for sizing) what spinner ring designs you want to use. Step 3: Check your belt sanding wit Ms. Ferrell Step 4: Position your ring in the "D" Position and re-check it with Ms. Ferrell before soldering with EASY SOLDER. * Solder the ring from the inside to avoid excess solder filling in the roller mill pattern. Step 5: File excess solder from the inside and outside of the ring (avoid filing off the roller mill pattern). File the outside edges with the large file. Step 6: Round out the ring on the ring mandrel, be sure to flip it to avoid giving the ring a cone shape. use the CROSS or BALL PEEN HAMMERS to add texture to the metal, forging it against the ring mandrel. *Be careful not to over hammer your ring (avoid making it too thin in spots or too large for your finger) Step 7: Sand and buff/polish the ring following the basic finishing touches procedures. Step 8: Create the spinner ring(s) measuring them around the outside of the base ring. If they require forging or planishing make them smaller so they don't become too loose. Complete the steps for finishing the spinner ring(s). Step 9: Place the spinner ring over the base ring and position the rings between two metal dapping punches. Use the leather mallet to strike the ball peen, thus slightly expanding or flairing out the ring on both outer edges. |
Design Ideas:
Step 9 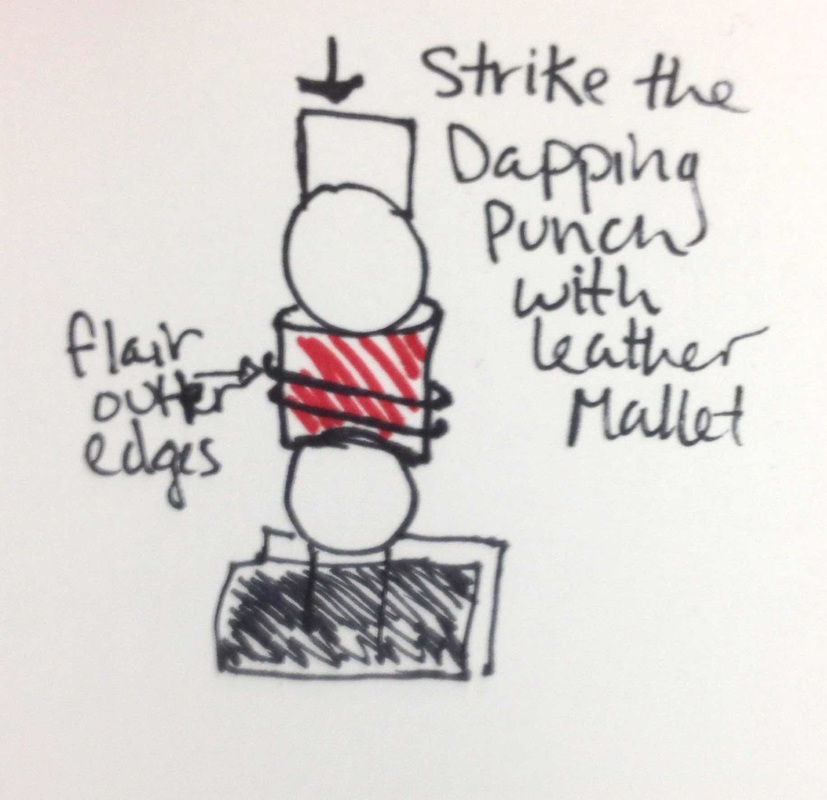
|
