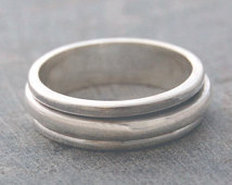
The Worry Ring: Option 2 "The Channel"
|
Steps and Tips:
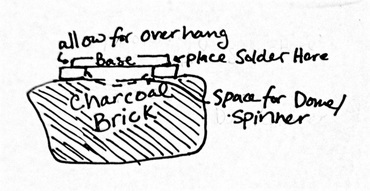
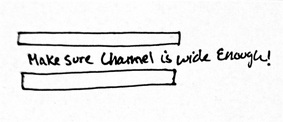
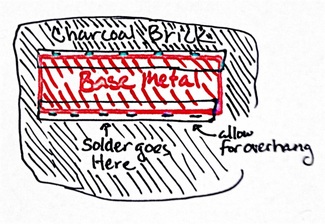
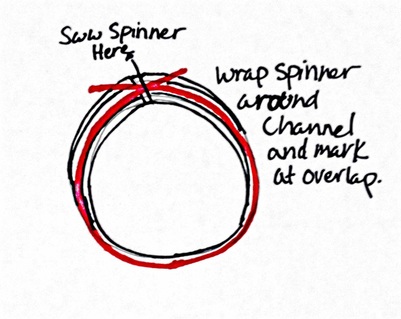
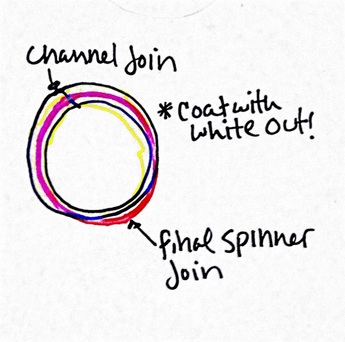
Step 1: Solder the narrow pieces to the wide piece to create a channel that is just a little wider than the material used for the spinner. *Tips: *Use HARD SOLDER and BINDING WIRE STAPLES TO HOLD THINGS IN PLACE. *Allow for the narrow pieces to overhang and file the edges after the soldering is complete. * Sweat solder on top of the charcoal brick Step 2: File the excess overhang of the soldered channel ring, the join should be invisible unless you chose to work with different colors of metal. Step 3: Measure the intended ring size, add 1.5 sizes when you measure the paper strip, mark the length with a shaprie, snip off the excess metal on both ends, and belt sand until straight and accurate length. *Tip: Always check this step with the loupe and Ms. Ferrell before bending your metal. Step 4: File the solder out of the inner channel (this may be easier to do in the "D" Position) Step 5: Coat the inner channel with white out except at the ends/join area. Pic Solder the "D" Position closed with MEDIUM solder. - Pickle the ring, scour it clean, file excess solder (inside and on the outer bands) then round our the ring and clean up the outside of the center join. Step 6: Re-Coat the inner channel with white out, also coat the ring join. Step 7: wrap the 1/2 dome or spinner material around the channel in the completed band. *Tip: This IS THE TRICKY PART * allow for overlap of the ring ends, make sure the band stays round, (cannot be put into the "D" Position) anneal the spinner material if needed. * mark the size with a thin sharpie, remove it from the channel and saw through the join. File or sand the sawed portion and reposition the spinner ring join around the channel. * Position the channel join opposite the spinner join. Step 8: Pick solder the spinner join with EXTRA EASY solder, being careful not to let it join to the channel. Step 9: Clean up the joins, sand, and complete the finishing touches planned for your ring (satin is an acceptable finish choice) |
Design Ideas:
Top View:
Step 5:

|
